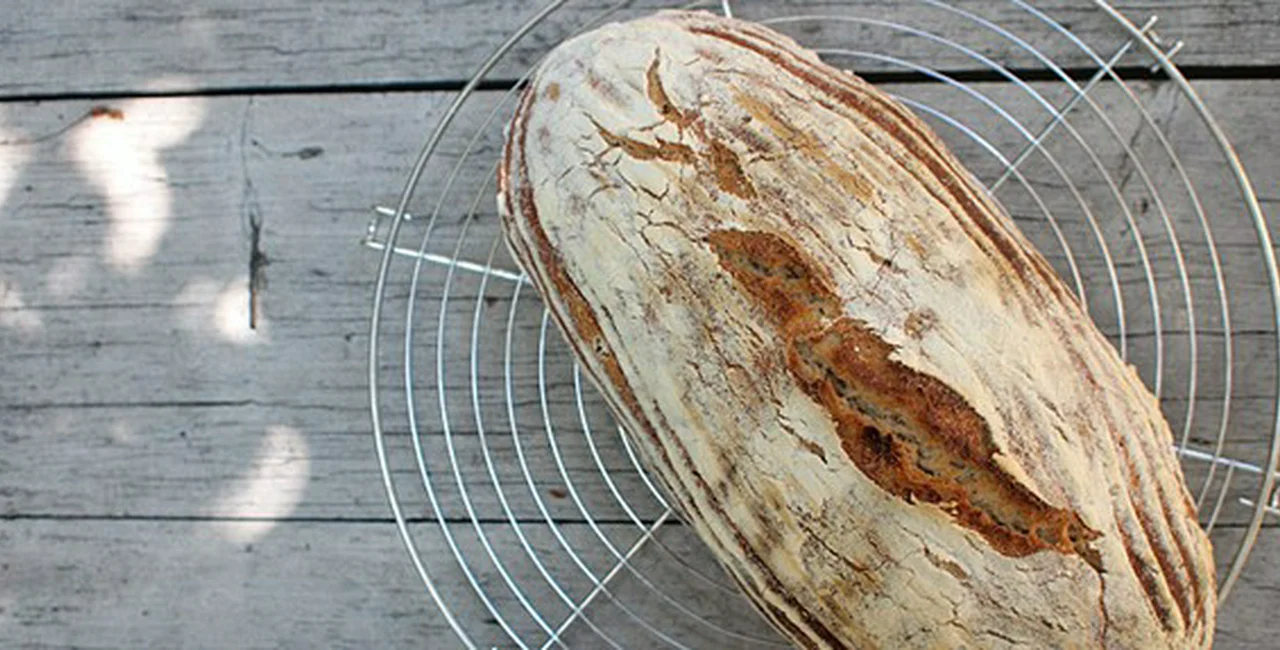
There’s something about bread fresh from the oven. The crust slightly cracked and dusted in flour – the smell alone is enough to stop you in your tracks. The good news is that with some practice you can make bread in your kitchen at home. What’s more, there are people in the Czech Republic who can help you.
Have Starter, Will Bake
Meet Pečempecen.cz, a social network of people who share both a love of bread as well as their own home-made sourdough starter. I met with one of the members, Michala Gregorová. Michala and others like her saw that the best way to get good quality bread was to bake it themselves.
“I started about two years ago. I bought the sourdough starter in a bakery because I wanted to make classic Šumava bread. I was quite successful, so [baking] grabbed my interest,” she said.
The idea behind the network is for people to share recipes, tips, experience, and most importantly to share sourdough starter with other bakers. In the link above you will find people who you can contact who will share their starter with you. Just click on the blue markers and it will tell you what type of leavening agent and how soon before you need it you should write to the person. In most cases it’s a couple of days. Near the heading ‘Doneste’, you will see what you need to take your starter home with.
The other possibility is to buy leavening agent. Starter is sold under the name žitný kvásek and is available from some bakeries and health food stores. Country Life sometimes have it. Or you can buy instant yeast (instantní droždí) from the supermarket.
Michala recommended yeast for beginners because, in her words, it is more reliable.
Your First Loaf
It is a pre-conception that people can’t make good bread at home. Michala insists we can be successful with regular flour from the supermarket using an ordinary oven. Whether you have gas or electric is not the issue. It only has to get hot enough.
“If you’re an inexperienced baker, it’s great to start with no-knead bread,” she said, recommending a recipe made famous by the New York Times. The video below shows Jim Lahey, head baker and owner of Sullivan Street Bakery (New York), going through the recipe.
Michala also suggested wheat flour when starting because it is much ‘friendlier’ to work with. Rye flour can be very sticky. I’m including the link to the Czech translation of the New York Times recipe, so you can find the Czech equivalents in the store. (You’ll need to scroll down past the video in the link to find the recipe.)
The best thing to do would be to try the recipe. Since the mixture needs to stand for 12 hours (and I hadn’t prepared something earlier) I decided to see what other bread related advice I could find.
Home-made Starter
Looking at a few starters, I got the impression they were quite easy. Perhaps deceptively easy is the best term. Just flour and water? Nothing could be that simple.
The best advice I could find in English on starters was at the website Sourdough Home. The entry is a little long-winded, but Mike, the man behind the site, goes through the assumptions and pitfalls about making your own starter as well as using a starter and maintaining one.
For people who read Czech, Pečempecen.cz recommends a method for rye based starter. This starter takes about three days. You will need 100 ml of rye flour and the same amount of lukewarm water. Mix together and let stand in a glass jar covered with cling film for a day at around 30°C. If it has started to go sour by the second day, add another 100 ml of flour and water. Bubbles should be forming and the color shouldn’t have changed. Repeat the process on the third day. By the fourth, you’re ready to use.
I gave both of these a try too.
Equipment
The great thing about the New York Times’ recipe is that you don’t need any special equipment. However, if you are looking for a proper bread baking equipment, the blogger Maškrtnica, who is a part of PečemPecem.cz, recommends trying Globus, Albert, Baumax or the websites Pekařský ráj and Pekařské ošatky. Ošatka is the Czech for proofing baskets (or banneton baskets), which are used to give the dough shape while it proofs (rises before baking) and to help form the crust. However, if you don’t have a proofing basket you can use a bowl lined with a flour coated dish cloth.
A Sense of Community
Something else which quickly becomes apparent from speaking with Michala and looking at the website is the sense of community.
“When Pečempecen.cz was founded, people discovered others who baked. It was great,” Michala said.
Apart from the network of people sharing the starters, the community of amateur bakers share recipes and advice via their Facebook page. And non-Czech are more than welcome and language won’t be a problem as many young people speak English.
“And it would be super if expats could share their own local bread recipes,” Michala said.
Final Results
I’ll be the first to admit I still have a long way to go before I’m completely self-sufficient in the bread department. The first loaf turned out okay, but there was a marked improvement in the second. The crust was crispy without being too hard and the inside was nice and spongy.
As for the starters, the wheat one started well then stopped on the third day. My rye starter on the other hand is still going. With it, I plan to make the following:
Czech Bread
My next step will be to try the bread at the blog Cuketka.cz. Here’s a translation of the recipe.
Ingredients
• 300g of rye sourdough starter
• 300g flour (wheat or rye-wheat bread flour)
• 250ml of water (for the start. You will probably need more)
• 5g caraway seeds (drcený kmín)
• 12 g of salt
• Extra flour for dusting
• Proofing basket
Steps
(Apologies to Mr. Cuketka but in the interests of space I’ve taken the liberty of summarizing.)
• In a bowl, mix the dry ingredients
• Add the starter and 200 ml of water
• Mix in a mixer for 15 minutes or by hand until the dough is a bit runny but still sticks to the sides of the bowl
• Pour dough onto a floured surface (don’t worry if it is a bit of a mess) and start to knead (being share to cover your hands in flour). As you press, turn the dough 90°. You do this until the dough no longer takes up extra flour and has a smooth texture. (Learning this feel comes with practice, I’ve been told.)
• Cover with a cloth or plastic bag for 30 mins.
• Form into a “log” and place in the proofing basket
• Cover with flour and leave to proof (leaving the dough to rest and rise) for three to five hours.
• Preheat oven to 250°C for at least 30 mins.
• Put the dough on a baking tray and put in the oven, squirting the bottom of the with some water just before closing the oven door.
• Bake for 30 minutes. The bread should sound hollow when tapped.
Best of luck with your bread making. You can share your tips, stories, recipes and of course photos of bread on the Cuketa’s FaceBook page. We’d also like to some of your baking achievements. Here are mine.
Happy Baking.
Photos from Cuketka.cz
Related articles


 Reading time: 6 minutes